Carpet can make your home a warm, comfortable place to be, fitting carpet is a key part of that. It can be stylish, add a touch of class or showcase a personality that makes your house feel like a home. But when a carpet is badly fitted you can always tell, and you will spend hours tucking in frayed edges and corners when they come up.
The truth is that while your carpet might look like someone has just thrown it onto the floor and glued it down, it’s much more complicated than that. There are 3 main aspects to fitting carpet that you need to understand before you try to fix it yourself or try your hand at laying your own.
There is also a number of equipment items that we recommend for the process you can find them here. If you want a more comprehensive list of tools and equipment to fit your carpet have a look here.
Removing your old carpet
Before you fit your new carpet there is a number of things you need to do first to make the process more smooth. Your sub-floor (the foundation for a floor in your room). If the sub-floor is not prepared properly it will affect the way that your carpet lies and potentially ruin the overall look.
Prepare the subfloor
Wear knee pads when doing this, if your floorboards are damaged, it might be cheaper and easier for you to pull them all up and start from scratch. Use fit tongue-and-groove chipboard flooring panels (for more information on this see here) which will give you a good base for the final flooring. Make sure the boards have been conditioned before laying your new carpet, do this by spraying them with water over the textured side and then stacking in the room in which they are going to be used back to back. Let them dry for at least 48 hours and as they dry they’ll retract back. You must do this to reduce the risk of expanding after they’ve been fitted.
Make sure there are no nails sticking up, use 19mm nails to reduce the risk of hitting any wires or pipes below. Start in the centre of one edge and work your way across. Lay the hardboard sheets texture-side up as you’ll need something for any glue/adhesive to stick to. Push the sheets together and nail the edges where the sheets meet first.
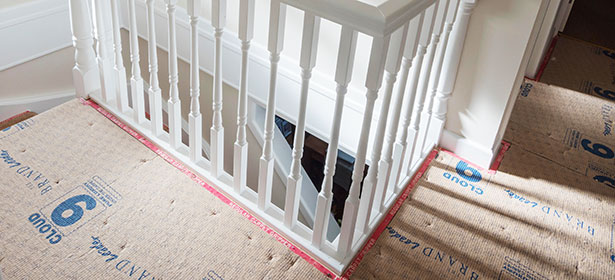
Grippers | Carpet Fitting
There are 2 stages to carpet fitting before any actual carpet comes into the room. The first of these is fitting carpet grippers to your existing floor. Carpet grippers are long, thin pieces of wood fitted with small sharp pins, some going one way and some the opposite, that will eventually hold your carpet in place and prevent slipping or movement. When handling carpet grippers you should always wear gloves, as they come with the pins pre-installed to save you time (and more than a few damaged fingers). Before you attach a single one you should first check for hidden pipes and wires with a cable detector and mark their positions on the floor. If you find any or you need to fit a gripper in an awkward place (for example under a radiator) you will need to use gripper adhesive instead (this is different from standard glues). You can then lay the grippers down and cut them to size with a saw or a pair of tin snips if you have them, securing the lengths together. You should have the angled edge facing the skirting board and leaving a gap of roughly 7mm between the skirting boards and the gripper to accommodate for the carpet. On any lengths of the gripper that you will be glueing down, remove the pins and secure them to the floor. You can now hammer the remaining gripper into place, taking care not to damage the skirting boards as you do.
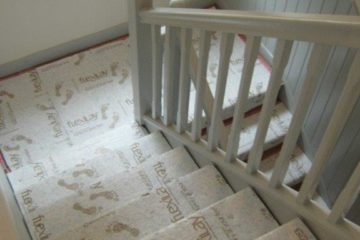
Underlay | Carpet Fitting
You are now ready to put down the underlay for your carpet. A carpet fit is only as good as it’s underlay, so it’s important to invest in quality underlay and take your time getting it right. We also recommend using lining paper before applying your underlay. This not only stops the underlay from sticking to the floor, but it also stops any dust and dirt from passing through from the floor to the carpet. It also improves insulation and makes your carpet last longer without costing a fortune, so it’s good practice to put it down. Laying it is as simple as rolling the lining paper onto the floor and securing it with wither a hammer tacker or heavy duty staple gun. You could also use some spray adhesive around the edges if you like. Make sure that when you lay it the edges overlap slightly to provide a secure base. You can now place the underlay loosely on the floor, rubber side down until it covers the area you want to carpet. Once they are laid you can then go around and but the edges together to ensure they all meet up perfectly and there are no gaps. Use a Stanley knife to cut the edges level with the gripper rods. Join the gaps between each piece of underlay with heavy duty cloth or carpet tape. Take extra care to make sure you don’t overlap any of the underlay though, as this could cause lumps and bumps in your carpet. It needs to be smooth and level.
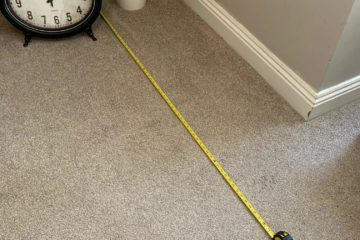
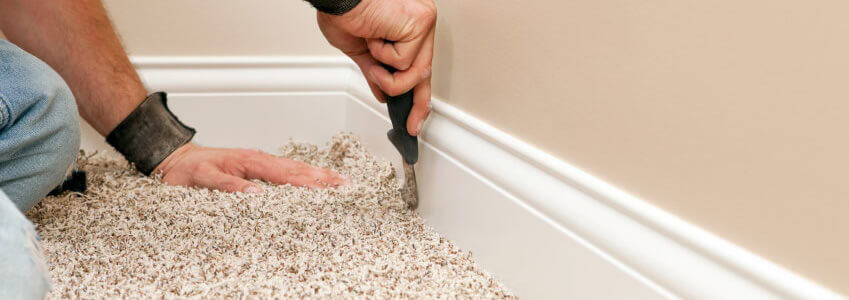
Fitting The Carpet
You are now ready to fit your carpet! Unroll your carpet and lay it loosely into position on the floor. Stand in one corner with your foot underneath the carpet and move it into place with your other foot. Cut the carpet down to size if you need to, but leave at least 50mm extra around the edges. Once it is in place, cut a vertical line the excess directly above the corners and trim the overlapping triangles so you can lay the carpet flat onto the gripper. You should start fitting your carpet along the longest wall and work back towards to door. Use a tool called a carpet tucker and firmly crease the carpet against the skirting to mark a fold line. Hold the carpet down with one hand and with the other use a Stanley knife with a sharp blade to cut along the carpet edge. You will need to cut slightly higher than the carpet surface. Next place your carpet stretched teeth down slightly away from the skirting and push firmly against the padded end with your knee to hook the carpet onto the gripper on either side. Push any excess down with the tucker. Repeat this along the wall, and then side walls before finishing at the opposite wall. If you need to fit the carpet around a pipe, simply make a straight cut from the edge of the carpet to the outer edge of the pipe and press the carpet around it. When you get to the doorway, cut the carpet in line with the edge of the flooring in the next room. Fit an appropriate threshold bar and push the excess carpet under it.
Of course, carpet fitting is not simple and a lot of things can go wrong. It’s a good idea to start with a small room if you have not done it before to get the hang of it. If you’re not confident, please hire a professional to come out and help you. For more advice on fitting carpets or to get your free quote, get in touch with one of the team today.